
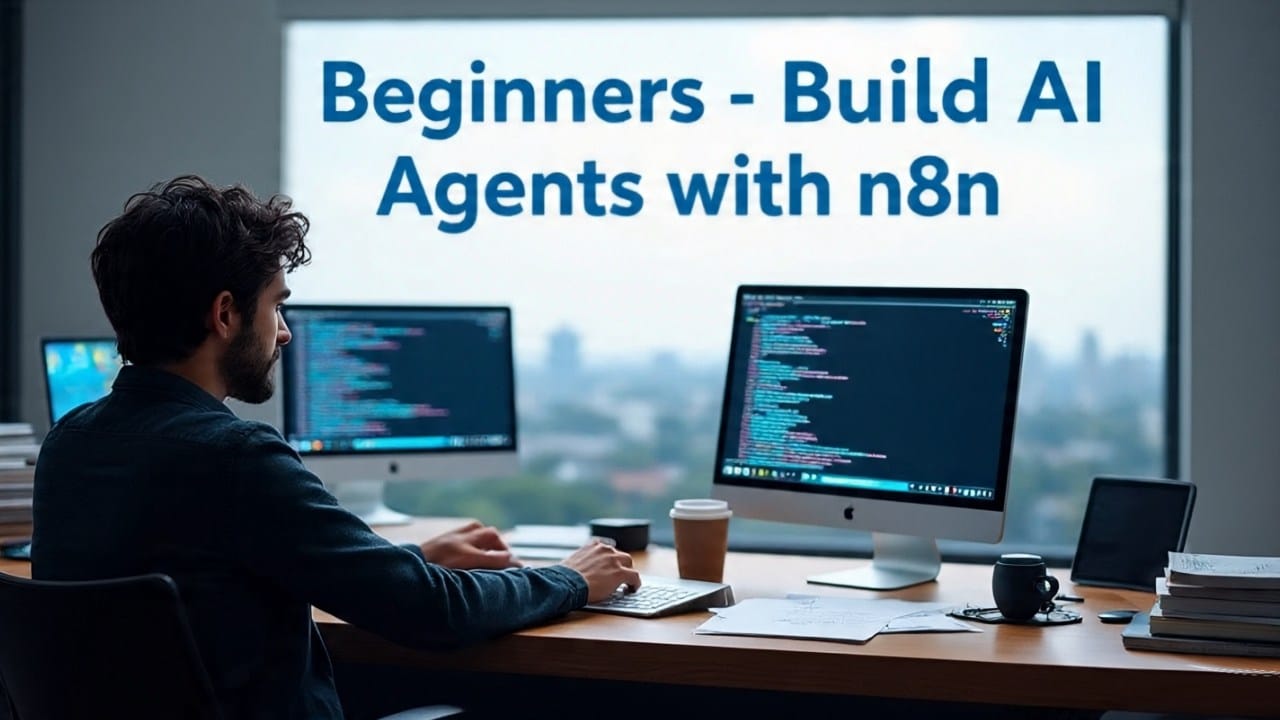
Building Advanced AI Agents with n8n: A Comprehensive Guide to Multi-Agent Orchestration and Custom UIs
Here is the complete book, structured to be clear and accessible for anyone interested in building AI agents with n8n.
Introduction: Unlocking the Power of AI Automation
In an increasingly automated world, Artificial Intelligence (AI) agents are becoming indispensable tools for enhancing productivity, streamlining workflows, and creating intelligent applications. These agents, capable of understanding natural language and executing complex tasks, represent a significant leap forward in how we interact with technology.
This book serves as your comprehensive guide to building sophisticated AI agents using n8n, a powerful workflow automation platform. We’ll start with the fundamentals, progress through integrating diverse communication channels, and culminate in designing advanced multi-agent hierarchies that allow for unparalleled specialization and efficiency. Whether you’re a beginner curious about AI automation or an experienced developer looking to leverage n8n’s capabilities, this guide will equip you with the knowledge and practical skills to bring your AI agent ideas to life.
Get ready to transform your understanding of automation and build AI systems that truly work for you.
Chapter 1: The Foundations – Setting up Your First AI Agent in n8n
Before we dive into complex multi-agent systems, it’s crucial to understand the fundamental building blocks of an AI agent within n8n. This chapter will walk you through setting up your first basic agent, covering the essential nodes and configurations.
1.1 Understanding Core Components
At the heart of every n8n AI agent workflow are a few key components that work in harmony:
- n8n Interface Overview: n8n is a visual workflow automation tool. Your workspace is where you drag and drop nodes, connect them, and configure their settings. Workflows are your automations, and nodes are the individual steps or actions within those automations.
- The Chat Trigger Node: This node acts as the entry point for your conversations. It’s how you, or an external chat application, will initiate a dialogue with your AI agent. For initial development and testing, it provides a convenient chat interface directly within n8n.
- The AI Agent Node: This is the brain of your operation. The AI Agent node is specifically designed to interact with Large Language Models (LLMs), manage tools, and process natural language. It takes your input, decides what actions to take, and generates a response.
- Connecting an LLM (e.g., OpenAI GPT-4.5 Mini): The AI Agent node doesn’t “think” on its own. It needs to be connected to a powerful LLM that provides the intelligence. OpenAI’s GPT models are popular choices due to their strong performance and versatility. You’ll need an API key from OpenAI to establish this connection.
- What are “Tools” and why are they essential? Tools are external services or other n8n nodes that your AI agent can call upon to perform specific actions. An LLM alone can generate text, but with tools, it can do things. For example, a “Google Calendar Tool” allows your agent to create or search events, or a “Gmail Tool” lets it send emails. Tools bridge the gap between AI intelligence and real-world actions.
- The System Message (Custom Instructions): This is arguably the most critical part of instructing your AI agent. The system message provides the LLM with its core identity, goals, guidelines, and instructions on when and how to use its available tools. Think of it as the agent’s “prime directive.” Well-crafted system messages lead to predictable and effective agent behavior.
1.2 Your First Simple Agent (Hands-on Tutorial)
Let’s get hands-on and build a basic AI agent that can respond to simple queries.
Prerequisites:
- An n8n instance (cloud or self-hosted).
- An OpenAI API key.
Step-by-Step Guide:
- Create a New Workflow:
- Log in to your n8n instance.
- From the dashboard, click on
New Workflow. - Rename your workflow in the top left corner (e.g.,
My First AI Agent).
- Add a Chat Trigger Node:
- Click the
+button or type/to open the node search. - Search for
Chat Triggerand select it. - Rename this node to
User Chat Inputfor clarity. This node will allow you to type messages directly into the n8n canvas to test your agent.
- Click the
- Add an AI Agent Node:
- Click the
+button that appears to the right of theUser Chat Inputnode, or click/anywhere on the canvas. - Search for
AI Agentand select it. - Connect the
User Chat Inputnode’s output to theAI Agentnode’s input.
- Click the
- Add an OpenAI Chat Model:
- Click the
+button that appears next to theAI Agentnode’s “Chat Model” input. - Search for
OpenAI Chat Modeland select it. - Configure your OpenAI Credential:
- If you don’t have one, click
Create New Credential. - Paste your OpenAI API Key into the
API Keyfield. - Click
Save.
- If you don’t have one, click
- For
Model,GPT-4.5 Miniis a good, cost-effective choice for basic agents. You can leave other settings as default for now. - Rename this node to
GPT-4.5 Minifor quick identification.
- Click the
- Instruct the AI Agent with a System Message:
- Double-click on your
AI Agentnode to open its settings. - Under
Options, clickAdd Option. - Select
System Message. - Change the input type for the System Message to
Expression(click the sparkle icon to the right of the field). This allows for multi-line, rich instructions. - Paste the following into the expression editor:
You are a friendly and helpful assistant. Your goal is to answer questions concisely and politely. - Click
Save(or outside the settings to close them).
- Double-click on your
- Connect AI Agent Output to Chat Input:
- By default, the AI Agent node’s output will automatically be routed back to the
Chat Triggernode if it’s the last node in the direct line, allowing for a conversational loop within the n8n interface.
- By default, the AI Agent node’s output will automatically be routed back to the
- Test Your Workflow:
- Ensure your workflow is active. In the top right corner of your n8n workflow canvas, toggle the
Activeswitch to ON. - Click the
Chatbutton on yourUser Chat Inputnode (or theExecute Workflowbutton in the top right and then type into the Chat Input field). - Type a message like “Hello, how are you today?”
- The AI Agent should process this and send a friendly response back to your chat input field.
- Observe the execution history in the
Executionstab to see how data flows through your nodes.
- Ensure your workflow is active. In the top right corner of your n8n workflow canvas, toggle the
Congratulations! You’ve just built and tested your first basic AI agent in n8n. This foundational understanding will be crucial as we build more complex and intelligent systems.
Chapter 2: Enhancing Intelligence – Memory and Context
A basic AI agent treats each message as a new, isolated conversation. This leads to disjointed interactions where the agent “forgets” what was just discussed. To build truly intelligent and user-friendly agents, we need to give them memory – the ability to retain conversational context.
2.1 The Need for Memory
Imagine chatting with a human who immediately forgets everything you said after you finish a sentence. That’s what a memory-less AI agent is like. For a natural and helpful conversation, an agent needs to:
- Understand follow-up questions: If you ask “What should I eat for dinner?” and then “How about something healthy?”, the agent needs to know “healthy” refers to dinner.
- Reference previous information: It should recall details provided earlier in the conversation.
- Maintain continuity: The entire interaction should feel like a flowing dialogue, not a series of unrelated queries.
Without memory, an agent will constantly ask for clarification or provide irrelevant responses, leading to user frustration.
2.2 Implementing Simple Memory
n8n’s AI Agent node comes with built-in memory capabilities, making it straightforward to add conversational context. We’ll use the Simple Memory option for this.
- Simple Memory: This is the most basic form of memory, storing previous turns of the conversation directly within the n8n execution context for a single, ongoing session.
Key Memory Configuration Settings:
- Key: This is crucial. The
Keyacts as a unique identifier for a specific conversation session. The AI Agent uses this key to know which past messages belong to the current conversation.- For Chat Triggers: If using the internal n8n chat, the AI Agent automatically handles the session ID.
- For External Chat Apps (e.g., Telegram): You’ll typically use the unique
chat.idprovided by the external platform. This ensures that conversations from different users or different chat groups are kept separate.
- Past Interactions: This setting determines how many of the most recent conversational turns (messages and responses) the AI Agent will “remember” and include as context in its prompt to the LLM.
- A higher number means more context but can increase token usage (and thus cost) and potentially slow down responses.
- A lower number saves tokens but might lead to the agent forgetting relevant details too quickly. A value of
10is often a good starting point.
2.3 Hands-on: Making Your Agent Remember
Let’s enhance our My First AI Agent workflow to include memory.
Step-by-Step Guide:
- Open Your Workflow:
- Navigate back to your
My First AI Agentworkflow in n8n.
- Navigate back to your
- Access AI Agent Node Settings:
- Double-click on your
AI Agentnode to open its configuration.
- Double-click on your
- Add Simple Memory:
- Scroll down within the AI Agent settings to the
Memorysection. - Click the
Add Optionbutton. - Select
Simple Memory.
- Scroll down within the AI Agent settings to the
- Configure Memory:
- For the
Keyfield, if you are using theChat Triggernode for testing, you can leave it as default (JSON Session ID). TheChat Triggerautomatically provides a session ID. - For
Past Interactions, enter10. This means your agent will remember the last 10 exchanges in the conversation.
- For the
- Save Your Workflow:
- Click
Save(or outside the settings to close them). - Ensure your workflow is still Active.
- Click
- Test Conversational Memory:
- Click the
Chatbutton on yourUser Chat Inputnode. - Reset the chat session first (there’s usually a small refresh/reset icon near the chat input field, or you can clear the field and type a new message). This ensures you start with a clean memory.
- Type: “What is the capital of France?”
- The agent should respond: “The capital of France is Paris.”
- Now, type: “What about Germany?” (without mentioning “capital” again).
- Expected Behavior: Because of memory, the agent should understand you’re still asking about capitals and respond: “The capital of Germany is Berlin.”
- Click the
You’ve successfully implemented memory in your AI agent! This significantly improves the user experience by allowing for more natural and continuous conversations. In the next chapter, we’ll explore how to connect your agent to external communication platforms like Telegram and even custom web interfaces.
Chapter 3: Multi-Channel Communication – Engaging Your Agent Anywhere
An AI agent confined to the n8n canvas is useful for development, but its true power is unleashed when it can interact with users through various communication channels. This chapter will guide you through connecting your agent to external platforms, specifically Telegram, and introduce the concept of building custom web interfaces using “vibe coding” and n8n’s Webhook node.
3.1 Introduction to Communication Mediums
Communication mediums are the bridges that allow your users to interact with your AI agent. These can range from popular messaging apps to custom-built web applications. The key is to design your n8n workflow to correctly receive input from these mediums and send responses back.
3.2 Building a Telegram Chatbot
Telegram is a popular messaging app that’s relatively easy to integrate with n8n. We’ll set up a bot that can understand both text and voice messages.
Prerequisites:
- A Telegram account.
- Your existing AI agent workflow with memory (from Chapter 2).
Step-by-Step Guide:
- Create a Telegram Bot (Using BotFather):
- Open Telegram and search for
@BotFather. - Start a chat with BotFather and send the
/newbotcommand. - Follow the instructions:
- Choose a name for your bot (e.g.,
MyAwesomeAIBot). - Choose a unique username for your bot (must end with
bot, e.g.,MyAwesomeAIBot_bot).
- Choose a name for your bot (e.g.,
- BotFather will give you an HTTP API Token. Copy this token; you’ll need it for n8n.
- Open Telegram and search for
- Modify Your n8n Workflow for Telegram:
- Open your
My First AI Agentworkflow.
- Open your
- Replace Chat Trigger with Telegram Trigger:
- Delete the
User Chat Input(Chat Trigger) node. - Add a
Telegram Triggernode. - Configure Telegram Trigger:
- For
Telegram Api, clickCreate New Credential. - Paste your HTTP API Token (from BotFather) into the
Access Tokenfield. - Click
Save. - Ensure
Updatesis set toMessage.
- For
- Delete the
- Handling Text vs. Voice Input (If Node):
- Incoming Telegram messages can be text or voice. We need to handle them differently.
- Add an
Ifnode to your workflow, connected to theTelegram Trigger. - Configure the If Node:
- Value 1: Set this to
{{ $json.message.voice }}(This checks if a voice message exists in the incoming data). - Operation:
Is Not Empty
- Value 1: Set this to
- This
Ifnode will have two outputs:True(for voice messages) andFalse(for text messages).
- Process Voice Messages (True Branch):
- Connect the
Trueoutput of theIfnode to anOpenAI Transcribe Recordingnode. - Configure OpenAI Transcribe Recording:
- Use your existing OpenAI credential.
- For
Audio File, selectExpressionand use{{ $json.message.voice.file_id }}. This tells n8n to send the voice file to OpenAI for transcription. - For
Audio Data (Binary), ensure it’s mapped fromBinary Data.
- Connect the
- Standardizing Input with the Set Node:
- The
AI Agentexpects a consistent input name for the prompt. We’ll standardize ontext. - Add a
Setnode. Connect theFalseoutput of theIfnode (for text messages) and the output of theOpenAI Transcribe Recordingnode (for transcribed voice) to this singleSetnode. - Configure the Set Node:
- In the
Valuessection, clickAdd Value. - Name:
text - Value:
- For text messages: Select
Expressionand use{{ $json.message.text }}. - For voice messages: Select
Expressionand use{{ $json.text }}(thistextcomes from the transcription).
- For text messages: Select
- Make sure
Keep Only Setis unchecked to retain other useful Telegram data.
- In the
- Rename this node
Standardize Input.
- The
- Connect Standardized Input to AI Agent:
- Connect the
Standardize Inputnode to yourAI Agentnode. - Configure AI Agent Prompt:
- Open your
AI Agentnode settings. - Under
Prompt, changeSource for PrompttoDefine Below. - In the
Promptfield, enter the expression:{{ $json.text }}. This tells the AI Agent to use thetextfield we standardized.
- Open your
- Connect the
- Configure AI Agent Memory for Telegram:
- In the
AI Agentnode settings, underMemory, ensureSimple Memoryis selected. - For
Key, set it toExpressionand use{{ $json.message.chat.id }}. This ensures each Telegram chat has its own memory. Past Interactionscan remain10.
- In the
- Send the AI Agent’s Response Back to Telegram:
- Add a
Telegramnode after theAI Agentnode. - Configure Telegram Node:
- Operation:
Send a Text Message - Telegram API: Select your existing Telegram credential.
- Chat ID: Set to
Expressionand use{{ $json.message.chat.id }}. - Text: Set to
Expressionand use{{ $json.output }}(this is the AI Agent’s response). - Append n8n Attribution: Uncheck this if you don’t want the default n8n footer.
- Operation:
- Rename this node
Send Message to User.
- Add a
- Activate and Test Your Telegram Bot:
- Save your workflow.
- Activate the workflow (toggle
ActiveON). - Go to your Telegram app, find your bot (by its username, e.g.,
@MyAwesomeAIBot_bot), and start a chat. - Send text messages and voice messages.
- Observe the executions in n8n’s
Executionstab and the responses in Telegram. Your bot should now respond intelligently and maintain context!
3.3 Creating Custom User Interfaces with Webhooks (Vibe Coding)
While Telegram is great, sometimes you need a truly custom interface. This is where “vibe coding” and n8n’s Webhook node come into play.
- Vibe Coding: This is a new, conversational approach to app development. Instead of writing code, you describe the UI you want in natural language to an AI-powered platform (like “Lovable” mentioned in the source). This platform then generates the interface, which you can connect to your n8n backend. It’s about “feeling out” the design and functionality.
How it connects to n8n:
- Webhook Node (POST method): This n8n node creates a unique URL. When an external application (like your vibe-coded UI) sends data (a “POST request”) to this URL, it triggers your n8n workflow. This is how your custom UI communicates to n8n.
- Respond to Webhook Node: After your n8n workflow processes the data from the Webhook, this node sends a response back to the calling application (your custom UI). This is how n8n communicates back to your custom UI.
Step-by-Step Guide for Webhook Integration (Demonstration/Conceptual):
We’ll add Webhook capabilities to our existing multi-channel workflow.
- Add a Webhook Node (Trigger):
- Open your workflow. Add a new
Webhooknode to the canvas (it won’t be connected to the existing flow yet). - Configure Webhook:
- HTTP Method: Set to
POST. - Path: Enter a unique path (e.g.,
my-custom-ui). This will form part of your unique webhook URL. - Respond Immediately: Change this to
Using Respond to Webhook Node. This tells n8n to wait for a specificRespond to Webhooknode later in the workflow to send the final reply. - Copy the generated
Webhook URL– you’ll use this in your vibe-coding platform.
- HTTP Method: Set to
- Open your workflow. Add a new
- Add a Respond to Webhook Node:
- Add a
Respond to Webhooknode at the end of the workflow (initially, it won’t be connected). - Configure Respond to Webhook:
- Response Mode: Select
Respond with Text. - Text: Leave blank for now; we’ll map the AI agent’s output here later.
- Response Mode: Select
- Add a
- Integrating with a Vibe Coding Platform (Conceptual):
- (Outside n8n) Go to your chosen vibe-coding platform (e.g., Lovable).
- Provide a prompt describing your desired chat UI (e.g., “Create a clean, dark-mode chat interface with a loading sign.”)
- Crucially, paste your copied n8n Webhook URL into the platform when prompted for the backend endpoint. This tells the UI where to send messages.
- Data Transformation for Webhook Inputs:
- When your custom UI sends a message, it will likely come as
body.messageor similar. We need to standardize this for the AI Agent. - Add another
Setnode to the canvas. Connect theWebhooktrigger node (the input, not theRespond to Webhooknode) to this newSetnode. - Configure this new Set Node:
- Name:
text(to match our AI Agent’s expected prompt input). - Value: Set to
Expressionand use{{ $json.body.message }}(assuming your UI sends message content inbody.message). - Keep
Keep Only Setunchecked.
- Name:
- Rename this node
Standardize Webhook Input.
- When your custom UI sends a message, it will likely come as
- Conditional Routing for Responses (If Node):
- Now, you have two potential input paths (Telegram and Webhook) leading to your
AI Agent. You also need two output paths. - Delete the direct connection from the
AI Agentto theSend Message to User(Telegram) node. - Add a new
Ifnode immediately after yourAI Agentnode. - Configure this If Node:
- Value 1: Set to
Expressionand check for a unique property from the Webhook. A simple way is to check{{ $json.headers.host }}(if it’s not empty, it likely came from the webhook) or{{ $json.body.message }}. For simplicity, let’s use{{ $json.body.message }}. - Operation:
Is Not Empty
- Value 1: Set to
- Connect Paths:
- Connect the
Trueoutput of thisIfnode to yourRespond to Webhooknode. - Connect the
Falseoutput of thisIfnode to yourSend Message to User(Telegram) node.
- Connect the
- Now, you have two potential input paths (Telegram and Webhook) leading to your
- Map AI Agent Output to Respond to Webhook:
- In your
Respond to Webhooknode settings:- For
Text, set it toExpressionand use{{ $json.output }}(the AI Agent’s response).
- For
- In your
- Final Workflow Check:
- Ensure all nodes are connected correctly.
- The flow should now be:
Telegram Trigger/Webhook Trigger-> (Ifnode for Telegram) ->Standardize Input->AI Agent-> (Ifnode for output routing) ->Respond to Webhook/Send Message to User. - Save and Activate your workflow.
Now, your AI agent is truly multi-channel, capable of conversing via both Telegram and a custom web interface, dynamically routing inputs and outputs. This advanced setup brings us closer to building highly versatile and integrated AI systems. In the next chapter, we’ll explore how to break down complex tasks into a “multi-agent hierarchy” for even greater power and precision.
Chapter 4: Advanced Orchestration – Multi-Agent Hierarchy
While a single AI agent can be powerful, it has limitations, especially when dealing with diverse and complex requests. The solution lies in building a multi-agent hierarchy, where a central “classifier” agent directs tasks to highly specialized “child” agents. This approach ensures precision, reduces “hallucination,” and allows for scalable, robust AI systems.
4.1 The Limits of a Single Agent
Imagine asking a single employee to be an expert at sales, accounting, IT support, and marketing simultaneously. They’d likely struggle, provide inconsistent results, and make mistakes. The same applies to AI agents:
- Inconsistency: An agent trying to be a “jack of all trades” will often struggle to maintain consistency across different domains.
- Hallucination: When faced with tasks outside its core expertise or conflicting instructions, a general agent is more prone to generating incorrect or fabricated information.
- Scalability Issues: As you add more tools and responsibilities, the system message becomes unwieldy, and the agent’s performance degrades.
4.2 Understanding the Classifier Agent Concept
The multi-agent hierarchy addresses these limitations by introducing specialization and orchestration.
- Specialized Agents: These are individual AI agents, each an expert in a very specific domain or task (e.g., a “Google Calendar Agent,” an “Emailing Agent,” a “CRM Agent”). Their system messages and tools are highly focused.
- Classifier Agent (The Orchestrator): This is the front-facing agent that the user interacts with. Its sole purpose is to:
- Receive the user’s initial query.
- Determine which specialized agent/workflow is best suited to handle that query.
- Route the query (and potentially additional context) to the correct specialized agent.
Think of the Classifier Agent as an intelligent router or a “task dispatcher.” It doesn’t perform the tasks itself; it delegates.
4.3 Building the Classifier Agent
Let’s begin by setting up the Classifier Agent, which will be the entry point for our multi-agent system.
Project Setup (Recommended):
To keep your workflows organized, create folders in n8n:
My Personal Assistant(Main Project Folder)Tools(Sub-folder for specialized agent workflows)
Step-by-Step Guide for Classifier Agent:
- Create a New Workflow for Classifier:
- In your
My Personal Assistantfolder, create a new workflow. - Name it
Classifier Agent.
- In your
- Add a Chat Trigger Node:
- Add a
Chat Triggernode. Rename itChat. This will be our communication medium for testing this multi-agent system.
- Add a
- Add an AI Agent Node:
- Add an
AI Agentnode, connected to theChatnode. - Add an
OpenAI Chat Model(e.g.,GPT-4.5 Mini) and connect your credential.
- Add an
- Instruct the Classifier Agent (System Message):
- Open the
AI Agentnode settings and add aSystem Message(Expression type). - Paste the following instructions:
You are a personal assistant. Your goal is to determine which tool is best needed for the job and then passing user queries to those specific tools. The tools you will have access to are: - Google calendar agent - Emailing agent The user will be giving commands or asking questions about either their email or Google calendar. Your job is to pass two variables to each of these tools: 1. The user query (the exact query from the user). 2. A description of the task needing completed (you are to create this description to clearly define what the user needs so the other agents can interpret the user better). Example coordination: If the user creates an event and wants to email someone about it, then you should coordinate the communication between the two agents (the emailing agent and the Google calendar agent) as needed.- Note: The names
Google calendar agentandEmailing agentin the instructions must exactly match the names you give yourCall n8n Workflowtools later.
- Open the
- Save Your Workflow:
SavetheClassifier Agentworkflow.
4.4 Creating Specialized “Child” Agents (Example: Google Calendar Agent)
Next, we build a specialized agent that will handle all Google Calendar-related tasks. This agent will live in its own workflow.
Step-by-Step Guide for Google Calendar Agent:
- Create a New Workflow for Google Calendar Agent:
- Navigate to your
My Personal Assistantfolder, then into theToolssub-folder. - Create a new workflow and name it
Google Calendar Agent.
- Navigate to your
- Add an Execute Sub-Workflow Trigger Node:
- Click
Add First Step. - Search for
Execute Sub-Workflowand select it. - Configure Execute Sub-Workflow:
- Trigger: Select
When executed by another workflow. - Variables: This is where you define the inputs this workflow expects from the Classifier.
- Click
Add Field. - Name:
userQuery(Type:String) - Click
Add Fieldagain. - Name:
jobDescription(Type:String)
- Click
- Trigger: Select
- Rename this node
Personal Assistant Data. This node will receive the classified query and task description from the Classifier Agent.
- Click
- Add an AI Agent Node:
- Add an
AI Agentnode, connected to thePersonal Assistant Datanode. - Add an
OpenAI Chat Model(e.g.,GPT-4.5 Mini) and connect your credential. - Add Simple Memory:
- In the
AI Agentnode settings, underMemory, addSimple Memory. - Key: Set to
Expressionand use{{ $json.userQuery }}. This will ensure memory is tied to the specific interaction. - Past Interactions:
10
- In the
- Add an
- Instruct the Google Calendar Agent (System Message):
- Open the
AI Agentnode settings and add aSystem Message(Expression type). - Paste the following instructions:
Today's date is {{ $now }}. You are an expert Google calendar manager. Your job is to take in the 'userQuery' and 'jobDescription' to determine which Google Calendar tool needs to be used in order to complete what is being requested. If you do not have sufficient information to complete the task, then ask the user for more details in the specific category you need more details in (e.g., "What time should the event start and end?", "What is the title of the event?").- Note: We’ve included
{{ $now }}to give the agent current date context, which is vital for calendar operations.
- Open the
- Add Google Calendar Tools to the Agent:
- Open the
AI Agentnode settings. - Under
Tools, clickAdd Optionand selectGoogle Calendar. - Configure each tool (using your Google Calendar Credential):
- 1. Create Event Tool:
- Operation:
Create - Calendar ID: Select your calendar (use a test Google account if possible).
- Start Time: Let the
model define this parameter(sparkle icon). - End Time: Let the
model define this parameter. - Summary (Title): Add field
Summaryand let themodel define this parameter. - Tool Name:
create_events - Description:
Create an event in Google Calendar.
- Operation:
- 2. Search All Events Tool:
- Operation:
Get Many - Calendar ID: Select your calendar.
- Return All: Check this.
- After (Start Date Filter): Let the
model define this parameter. - Before (End Date Filter): Let the
model define this parameter. - Tool Name:
search_all_events - Description:
Get many events in Google Calendar.
- Operation:
- 3. Delete Event Tool:
- Operation:
Delete - Calendar ID: Select your calendar.
- Event ID: Let the
model define this parameter. - Tool Name:
delete_events - Description:
Delete an event from Google Calendar.
- Operation:
- 4. Get Single Event Tool:
- Operation:
Get - Calendar ID: Select your calendar.
- Event ID: Let the
model define this parameter. - Tool Name:
get_single_event - Description:
Retrieve a single event from Google Calendar by ID.
- Operation:
- 5. Update Event Tool:
- Operation:
Update - Calendar ID: Select your calendar.
- Event ID: Let the
model define this parameter. - Updated Fields:
- Add field
Summary, letmodel define. - Add field
Start Time, letmodel define. - Add field
End Time, letmodel define.
- Add field
- Tool Name:
update_events - Description:
Update an existing event in Google Calendar.
- Operation:
- Open the
- Connect AI Agent Output to Final Response (Optional, for now):
- For simplicity in this specialized workflow, you can add a
Respond to Webhooknode (if this agent were directly called by a UI) or just have theAI Agent‘s output as the last node. For now, the output of theAI Agentis sufficient as it will return to the Classifier.
- For simplicity in this specialized workflow, you can add a
- Save Your Workflow:
SavetheGoogle Calendar Agentworkflow.
4.5 Connecting Child Agents as Tools to the Classifier
Now, we link our specialized Google Calendar Agent workflow to our Classifier Agent as a tool.
Step-by-Step Guide:
- Go Back to Classifier Agent Workflow:
- Open your
Classifier Agentworkflow.
- Open your
- Add a Call n8n Workflow Tool:
- Open the
AI Agentnode settings. - Under
Tools, clickAdd Option. - Select
Call n8n Workflow.
- Open the
- Configure the Tool:
- Name:
Google calendar agent(This must exactly match the name you used in the Classifier’s system message and the name of the workflow). - Description:
Call this tool in order to do anything regarding Google calendar.(This description helps the Classifier AI decide when to use the tool). - Workflow: Select
Google Calendar Agentfrom the dropdown list (it will find workflows in yourToolsfolder). - Workflow Inputs:
- You will see
userQueryandjobDescriptionfields automatically. - userQuery: Select
From AI. (The Classifier agent will interpret the user’s original message and pass it). Alternatively, you could map{{ $json.text }}from the chat input for the exact original query if preferred. - jobDescription: Select
From AI. (The Classifier agent will generate a clear description of the task).
- You will see
- Name:
- Save Your Workflow:
SavetheClassifier Agentworkflow.
4.6 Hands-on: Building Your Multi-Agent Personal Assistant
Let’s test the entire multi-agent system we’ve built so far.
Step-by-Step Guide:
- Ensure All Workflows are Active:
- Go to your n8n dashboard and ensure both
Classifier AgentandGoogle Calendar Agentworkflows are Active.
- Go to your n8n dashboard and ensure both
- Test Event Creation:
- Open the
Chatinterface of yourClassifier Agentworkflow. - Reset the chat session.
- Type:
Create an event for tomorrow at 2 PM that lasts for an hour titled Movie Date. - Expected Flow:
- The Classifier Agent receives the query.
- It determines this is a Google Calendar task.
- It calls the
Google Calendar Agentworkflow, passing theuserQueryand a generatedjobDescription. - The
Google Calendar Agentreceives this, identifies thecreate_eventstool, extracts “tomorrow at 2 PM,” “lasts for an hour,” and “Movie Date” as the summary. - It then executes the Google Calendar
Create Eventoperation. - The response from the
Google Calendar Agentis returned to theClassifier Agent, which then displays it in your chat.
- Verify: Check your actual Google Calendar to confirm the event was created with the correct title and time.
- Open the
- Test Searching Events:
- In the
Classifier Agentchat, type:What do I have on Wednesday on my schedule? - Expected Flow: The Classifier routes to the
Google Calendar Agent, which then uses itssearch_all_eventstool to retrieve your events for Wednesday and displays them. - Verify: Check your actual Google Calendar for Wednesday’s events.
- In the
- Test Handling Missing Information:
- In the
Classifier Agentchat, type:Create an event for tomorrow.(Omit details like time and title). - Expected Behavior: The
Classifier Agentwill route to theGoogle Calendar Agent. TheGoogle Calendar Agent, seeing insufficient information for itscreate_eventstool, will ask clarifying questions (e.g., “What time should the event start and end? What is the title and summary of the event?”).
- In the
- Test Updating Events:
- In the
Classifier Agentchat, type:Can you change the Movie Date to be an hour later? - Expected Behavior: The
Classifier Agentroutes toGoogle Calendar Agent. TheGoogle Calendar Agentidentifies theupdate_eventstool, finds the “Movie Date” event (potentially using itsget_single_eventorsearch_all_eventsinternally if needed), and updates its end time. - Verify: Check your Google Calendar to see the event’s updated time.
- In the
This multi-agent hierarchy allows your AI assistant to handle complex, domain-specific tasks with high precision and flexibility, while maintaining a single, user-friendly entry point.
Challenge Exercise: Building the Emailing Agent
To solidify your learning, your next task is to independently create the Emailing Agent and integrate it into your existing multi-agent system. This will test your understanding of all the concepts covered so far.
Your Task:
- Create a New Workflow for the Emailing Agent:
- In your
My Personal Assistant->Toolsfolder, create a new workflow namedEmailing Agent.
- In your
- Add an
Execute Sub-WorkflowTrigger:- Configure it to trigger
When executed by another workflow. - Add the
userQueryandjobDescriptionvariables (String type), just like in the Google Calendar Agent. - Rename this node
Personal Assistant Data.
- Configure it to trigger
- Add an
AI AgentNode:- Connect it to
Personal Assistant Data. - Add an
OpenAI Chat Model(e.g.,GPT-4.5 Mini). - Add
Simple Memoryconfigured withuserQueryas the key.
- Connect it to
- Instruct the Emailing Agent (System Message):
- Provide clear instructions for an “expert email manager.”
- Emphasize its job is to use
userQueryandjobDescriptionto select the right email tool. - Crucially, instruct it to ask for more details if it lacks sufficient information (e.g., recipient, subject, body).
- Include
Today's date is {{ $now }}.
- Add Gmail Tools to the Emailing Agent:
- In the
AI Agentnode, addGmailnodes as tools. You’ll need to create a Gmail credential if you haven’t already. - Recommended Operations/Tools:
Send a Message:- Operation:
Send - Tool Name:
send_email - Description:
Send an email message to a recipient. - Let the model define parameters like
To,Subject,Body.
- Operation:
Get Many Messages:- Operation:
Get Many - Tool Name:
search_emails - Description:
Search and retrieve multiple emails based on criteria. - Let the model define parameters like
Query,Return All.
- Operation:
- (Feel free to explore and add other relevant Gmail operations like
Create Draft,Get Message,Delete Messageas additional tools).
- In the
- Connect the Emailing Agent as a Tool to the Classifier Agent:
- Go back to your
Classifier Agentworkflow. - In its
AI Agentnode, add a newCall n8n Workflow Tool. - Name:
Emailing agent(must match the Classifier’s system message). - Description:
Call this tool to do anything regarding email. - Workflow: Select your new
Emailing Agentworkflow. - Workflow Inputs: Map
userQueryandjobDescription(usingFrom AI).
- Go back to your
- Test Your Combined System:
- Save all workflows.
- Ensure both the
Classifier AgentandEmailing Agentworkflows are Active. - In the
Classifier Agentchat, try asking it to send an email (e.g., “Draft an email to John about our meeting tomorrow”). - Observe if the Classifier correctly routes the query to the Emailing Agent.
- If details are missing, does the Emailing Agent ask for them?
- If enough details are provided, does it successfully draft or send the email (check your Gmail drafts/sent folder)?
This exercise is your final test of understanding the comprehensive multi-agent system. It’s a challenging but highly rewarding step in your journey to becoming proficient in building AI agents with n8n.
Conclusion: Your Journey to AI Agent Mastery Begins
Congratulations! You have successfully navigated a comprehensive journey through the world of building AI agents with n8n. From setting up your very first intelligent assistant to orchestrating complex multi-agent hierarchies and connecting them to diverse communication channels, you’ve acquired a robust set of skills.
Key Learnings from this Guide:
- Fundamentals First: You’ve mastered the core components: the AI Agent node, LLMs, tools, system messages, and memory, which are the bedrock of any intelligent automation.
- Multi-Channel Engagement: You now know how to integrate your agents with popular platforms like Telegram and conceptualize connections to custom web interfaces through webhooks, making your agents accessible wherever your users are.
- The Power of Specialization: You understand why multi-agent hierarchies are essential for scaling intelligence, preventing errors, and achieving focused expertise, with the Classifier Agent acting as the intelligent dispatcher.
- Inter-Agent Communication: You’ve learned how specialized workflows can be called as tools, allowing agents to hand off tasks and share contextual information (
userQuery,jobDescription) seamlessly. - Iterative Development: The process of building AI agents is dynamic. You’ve experienced the importance of testing, observing, and refining your agent’s instructions and tool configurations.
What’s Next for You?
This book is just the beginning of your AI agent building journey. The skills you’ve gained are incredibly versatile and can be applied to countless scenarios, from personal productivity assistants to business automation solutions that can genuinely drive value and even generate income.
- Build More Projects: The best way to learn is by doing. Take on new challenges. Think of a problem in your daily life or business and consider how an AI agent could solve it.
- Explore More Tools: n8n boasts a vast library of integrations. Experiment with connecting your agents to databases, CRM systems, social media platforms, or other APIs to unlock even more possibilities.
- Deepen Your Knowledge: While this guide provides a strong foundation, the field of AI and automation is constantly evolving. Stay curious, continue experimenting, and seek out more advanced resources.
- Join a Community: Learning in isolation can be tough. Connecting with a community of like-minded builders (like AI Foundations, as mentioned by the speaker) can provide invaluable support, fresh ideas, and live assistance.
You now possess the foundational knowledge to turn your innovative ideas into tangible, intelligent applications. The ability to “vibe code” a user interface and connect it to a sophisticated n8n AI backend opens up a world where non-developers can create powerful, customized solutions.
Go forth, build, automate, and innovate!
Appendices
Appendix A: n8n Installation and Setup (Brief Overview)
- Cloud Hosted: Easiest way to get started. Sign up for an n8n cloud account.
- Self-Hosted: More control but requires technical setup. Options include:
- Docker: Recommended for simplicity.Bash
docker run -it --rm --name n8n -p 5678:5678 -v ~/.n8n:/home/node/.n8n n8nio/n8n - npm/yarn: For development environments.
- Docker: Recommended for simplicity.Bash
- Once running, access n8n via your web browser (usually
http://localhost:5678).
Appendix B: OpenAI API Key Setup
- Go to the OpenAI API website:
https://platform.openai.com/ - Sign up or log in to your account.
- Navigate to the API Keys section (usually found under your profile icon in the top right, then
API keys). - Click
+ Create new secret key. - Copy the generated key immediately. You will not be able to see it again. Store it securely.
- In n8n, when configuring an OpenAI node, select
Create New Credentialand paste this key into theAPI Keyfield.
Appendix C: Telegram Bot Creation Steps
- Open the Telegram app.
- Search for
@BotFatherand start a chat. - Send the
/newbotcommand. - Follow the prompts:
- Choose a display name for your bot.
- Choose a unique username for your bot (must end with
bot, e.g.,MyBot_bot).
- BotFather will provide you with an HTTP API Token. This is your bot’s secret key. Copy it.
- In n8n, when configuring a Telegram node, select
Create New Credentialand paste this token into theAccess Tokenfield.
Appendix D: Troubleshooting Common Issues
- “Credential not found” / “Invalid API Key”: Double-check your API keys/tokens. Ensure there are no extra spaces.
- “Agent is typing / Having trouble connecting” (for Webhooks):
- Verify your
Webhooknode is set toRespond when last node finishes. - Ensure there’s a
Respond to Webhooknode at the end of theTrue(Webhook) branch in your workflow. - Check if your vibe-coding platform is sending data to the correct URL.
- Verify your
- Agent not using tools:
- Review your
System Message: Are the tool names in the instructions exactly spelled as the tool names in theToolslist? - Is the tool’s
Descriptionclear enough for the AI to understand its purpose? - Is the
Source for Promptin theAI Agentnode correctly defined to receive input (e.g.,{{ $json.text }}orDefine Belowwith dynamic mapping)?
- Review your
- Agent asking for missing info unnecessarily:
- Check your
System Message: Does it correctly instruct the agent when to ask for more details? - Review the parameters you’re letting the
model definein your tools. Ensure they align with your instructions.
- Check your
- No response in chat/Telegram:
- Check n8n’s
Executionstab. Did the workflow run? - Did it reach the
Send Message to User(Telegram) orRespond to Webhooknode? - Are the
Chat ID(for Telegram) or response parameters (for Webhook) correctly mapped?
- Check n8n’s
- Memory not working:
- Is the
KeyinSimple Memorycorrectly mapped to a unique session ID (e.g.,chat.idfor Telegram)? - Are you resetting the chat session when testing if you expect a fresh memory state?
- Is the